


Tell your life story with a new kind of profile.
You’ve been hearing about all the wonderful new Facebook features, and like us, you’re probably super-eager to get started with them.
If you’re willing to go through a series of eight steps, you can get into the brand-new Facebook Timeline right now.
Simply follow the instructions in our gallery below, and suddenly you’ll be basking in a new world of Facebook goodness, just like the developers are. Follow the instructions carefully, and good luck.
Please note: If you haven’t already verified your Facebook account with either a mobile phone number or credit card number, you’ll be asked to do so before you can try the new features. If you need more help with that, here’s a helpful link.
First, you’ll need to go to the Facebook developer page, which is a part of your Facebook account. Make sure you’re logged into your Facebook account, and then simply follow this link to get started.
Update: When will we be able to opt into the Timeline without the need for going through these developers’ steps? Says Stefan Parker, Facebook UI Engineer on Quora, “We are aiming to start letting users opt into Timeline in the next two to four weeks. There is no set date though.”
How to Enable the New Facebook Timeline NOW
Step 1
When you get here, click "allow."

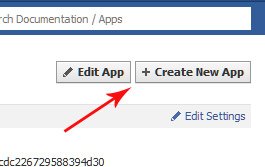
Step 2
Click "create new app"
Step 3
Name it whatever you want, and give it whatever namespace you'd like -- it doesn't matter. Click the checkbox "I agree to the platform privacy policy." And then click Continue, pass the security check by filling in the Captcha, and you'll be ready for the next step.

Step 4
After you've verified yourself as a human, you'll reach this screen, where you'll need to click "Open Graph" on the left side.

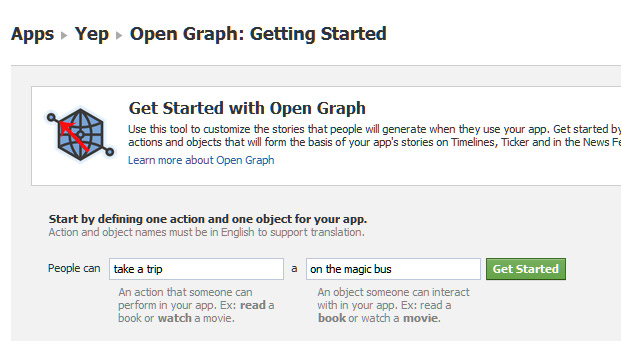
Step 5
You'll see the next screen, entitled "Get Started with Open Graph" -- fill in anything you want (it doesn't matter) in those fields under the heading "start by defining one action than one object for your app." Click Get Started.
Step 6
On this screen, do nothing except scroll to the bottom and click "Save Changes and Next." Do the same thing on the next screen.

Step 7
You'll be taken to this screen. Wait a few minutes, and then go to your Facebook homepage. That's where you'll be invited to enable Timeline. Be patient at this point -- sometimes it requires you to wait before the changes take effect.

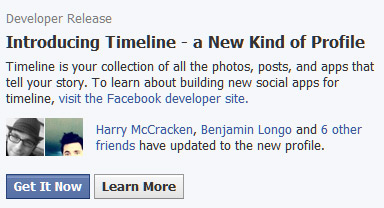
Step 8
When you go back to your Facebook homepage, you'll see this. Success! Click Get It Now, and you're in!
You've Done It!
Here's where you fiddle with your timeline, set it up the way you like it, and when you click Publish Now, your Timeline goes live. Or, you can wait two to four weeks (there is no set date), and you can opt in without going through this process. If you want to get into your timeline from another computer, the address for this developer's version is located at this URL: http://www.facebook.com/[yourusername]?sk=timeline and of course [yourusername] is your own Facebook user name.

Source


